Building a great product is important, but tracking its impact on end-users is even more important in order to determine its effectiveness.
Being a software developer means that I spend most of my time writing code to build and maintain features, and fix bugs that are uncovered along the way.
I wanted to gain first-hand experience in setting up simple analytics to track custom events in order to understand user behaviour. What better tool to start with than the ubiquitous Google Analytics? I chose Venture bites for this experiment.
Set up Google Analytics
First, create a Google Analytics(GA) account, property, view.
Then, create a GA tracking code under property. It starts with 'UA'.
Finally, we just need to paste the provided code snippet in every web page that we want to track.
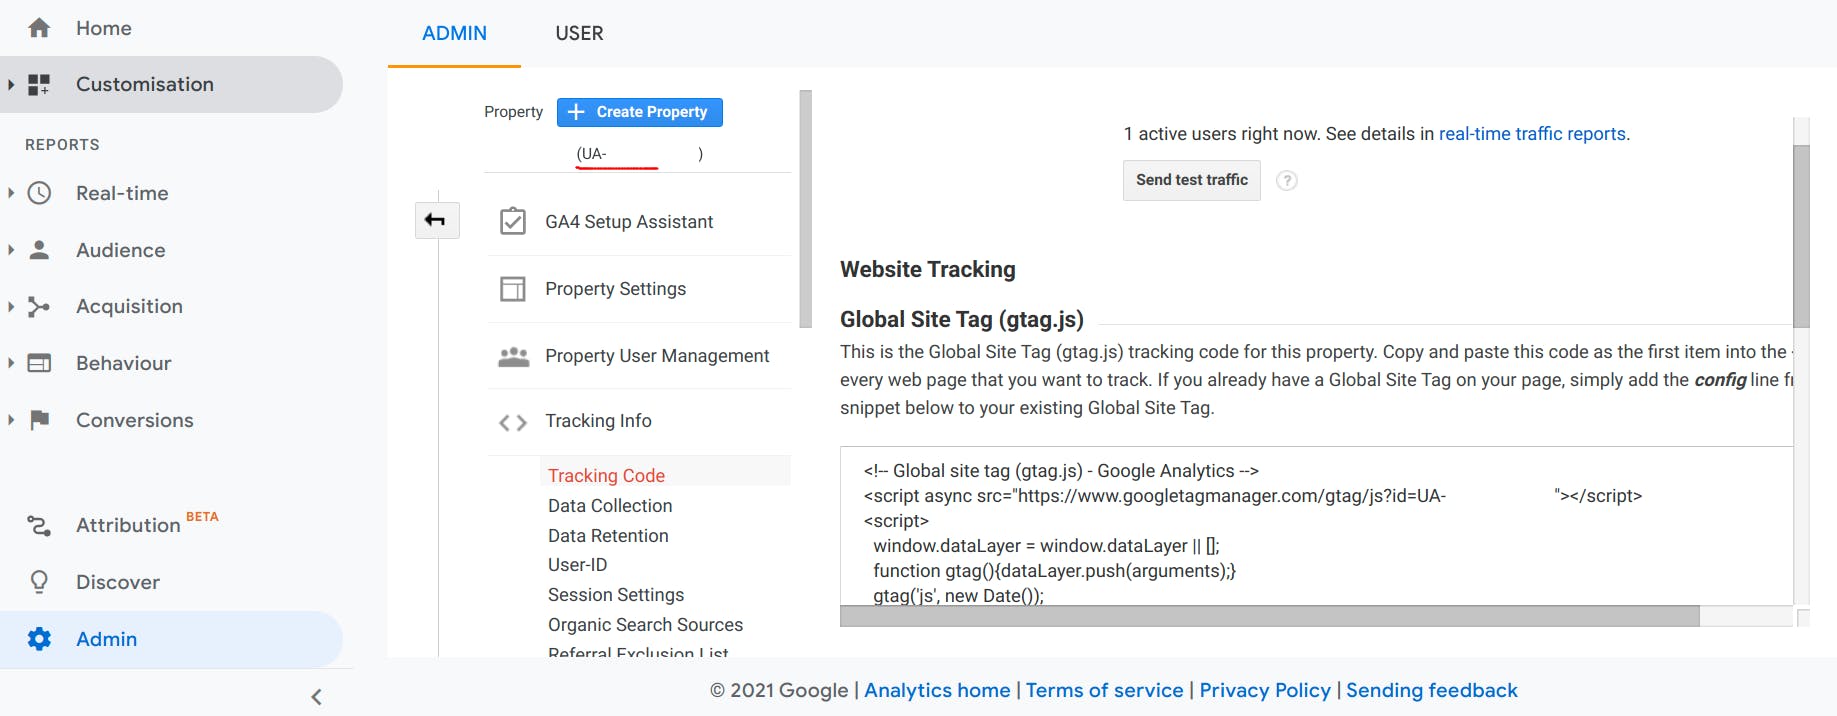
Where to find tracking code: Admin -> property -> tracking code
That's all!
By default, that piece of code only tracks page view, which is fine. But, we also want to track custom events too.
Google Analytics with Single Page Application
Furthermore, if our website/webapp is a Single Page Application, only the first page load will trigger the page view event because GA event is only triggered when there is a full page load which sends a request to the GA server.
But for a SPA, subsequent page load after the first will not trigger a full page load.
So, we have to set up custom events to tell GA to track them.
Also, I have chosen to use Google Tag Manager(GTM) to manage my GA tags. GTM simplify the management of various Google and third party tags.
Set up Google Tag Manager
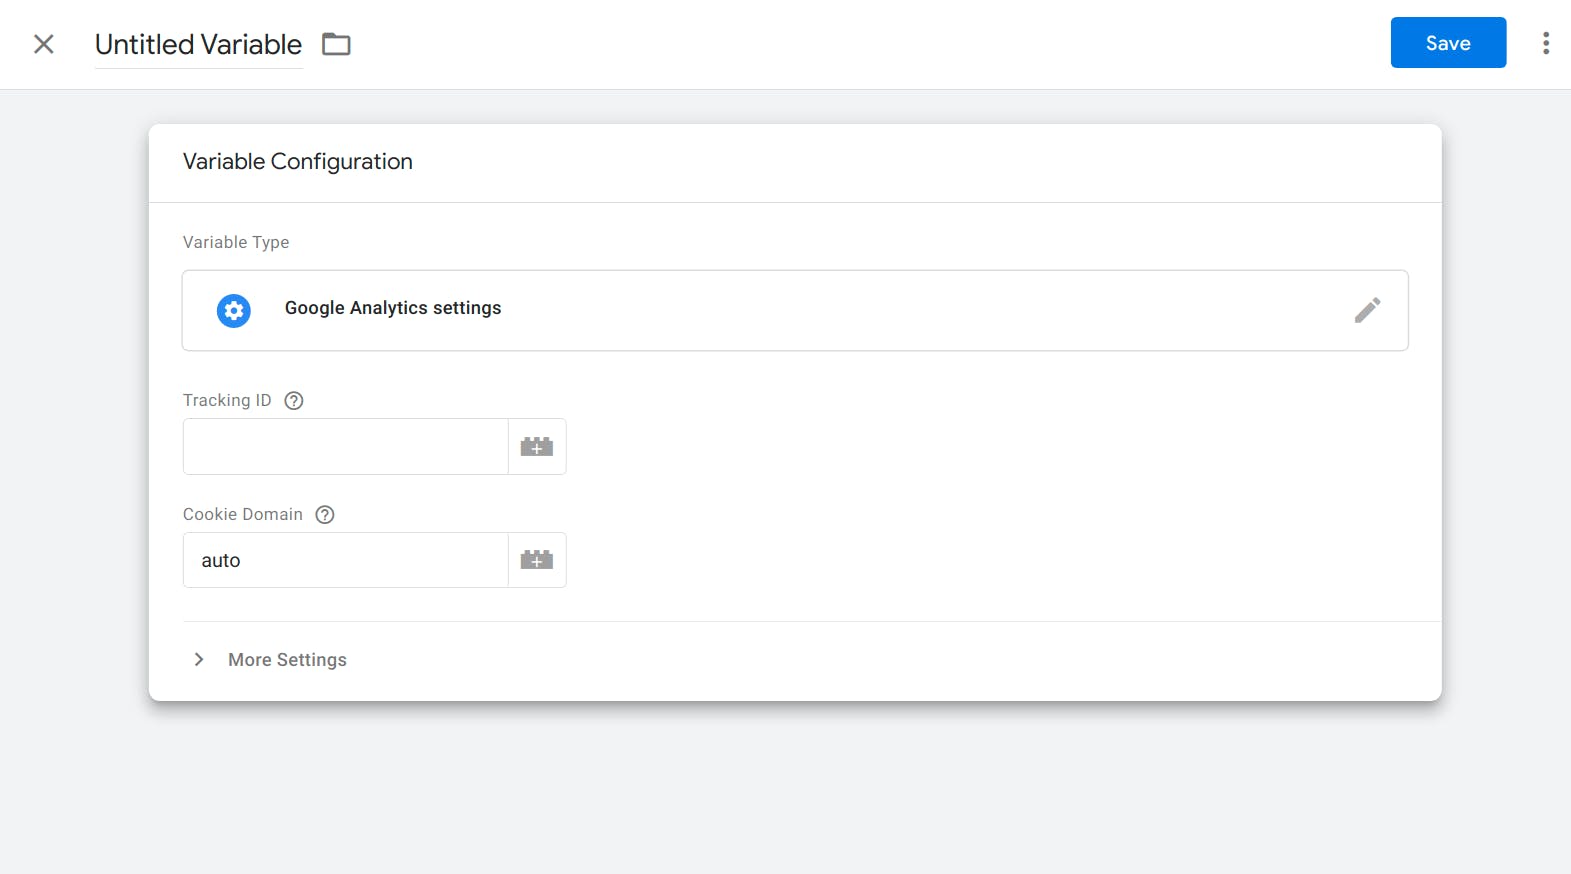
1. Create a GA settings variable
This is used to configure GA settings across multiple GA tags.
Paste the GA tracking code in "Tracking ID"
2. Create a tag manager account in GTM.
Note down the tag ID which starts with 'GTM'.
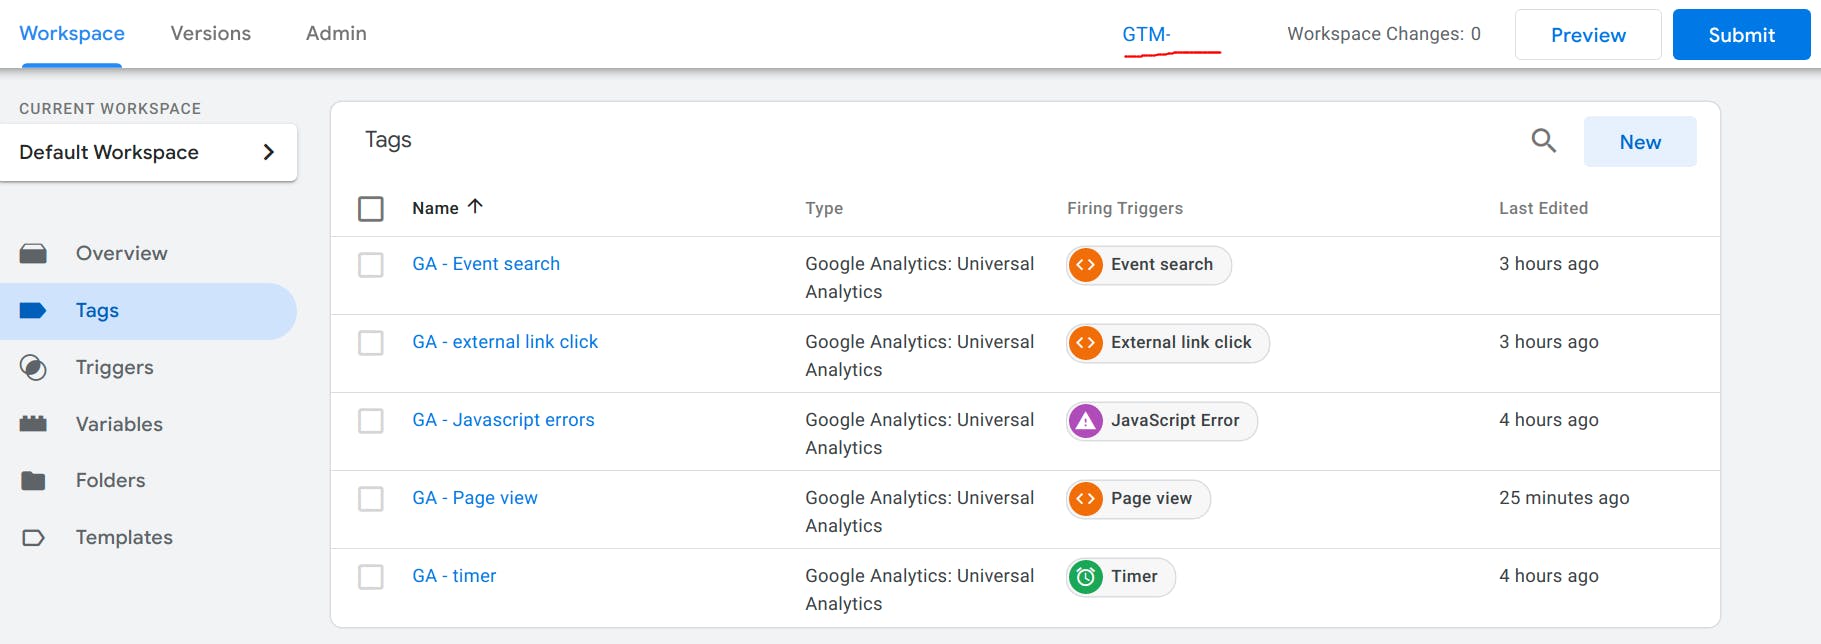
I have 5 tags that track different events.
3. Create a tag configuration
Create a tag configuration for Google Marketing Platform, and select the type of event to track(page view, custom event, etc).
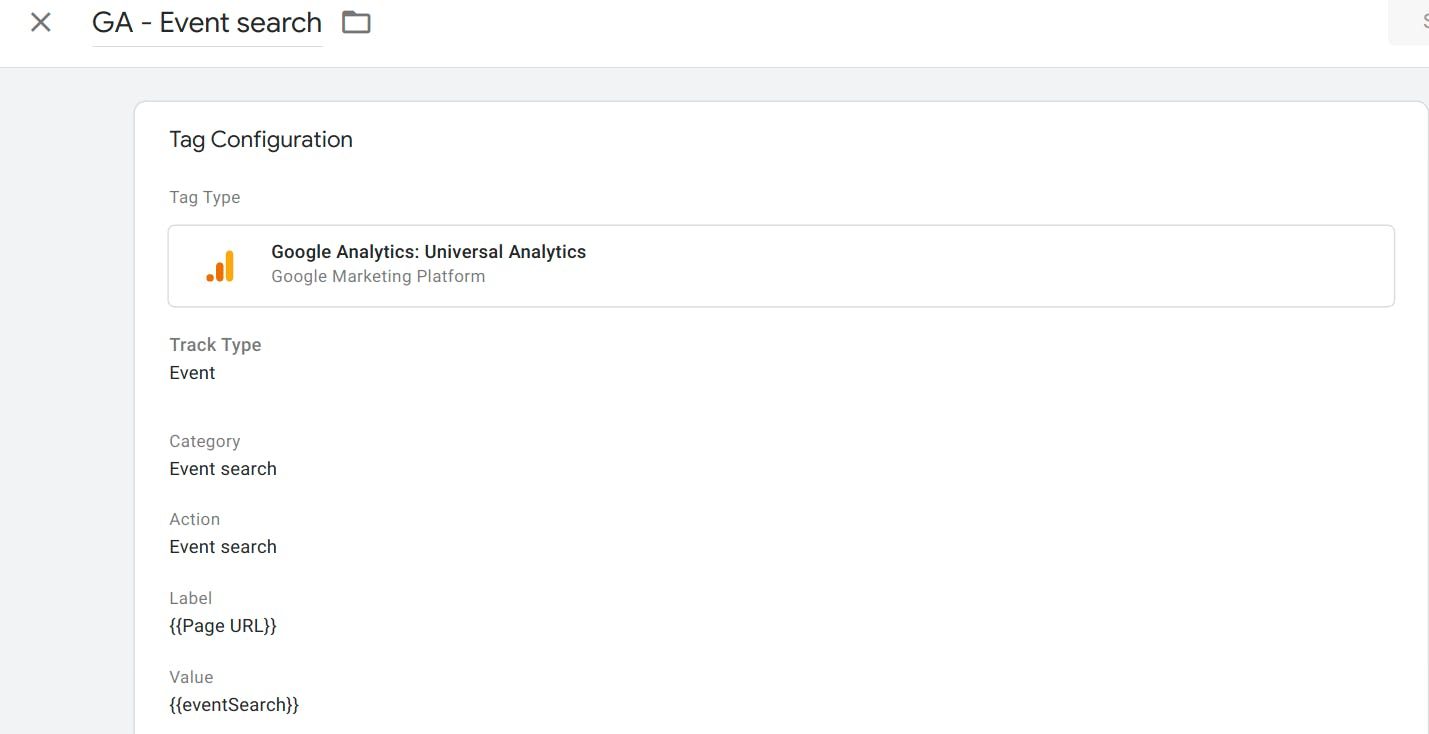
4. Create a tag trigger
Create a trigger to let GTM know when to fire a particular event. Afterwards, we can use the event name to fire this event.
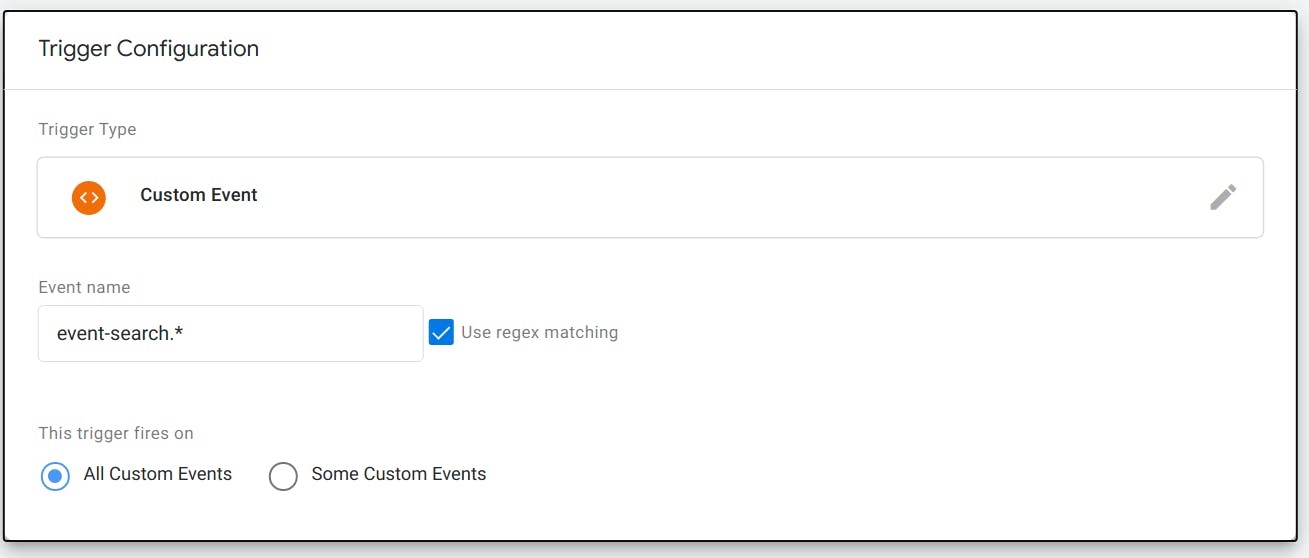
Trigger for event names starting with 'event-search'
5. Set up event variable
Create a dataLayer variable, which we will send from our SPA.
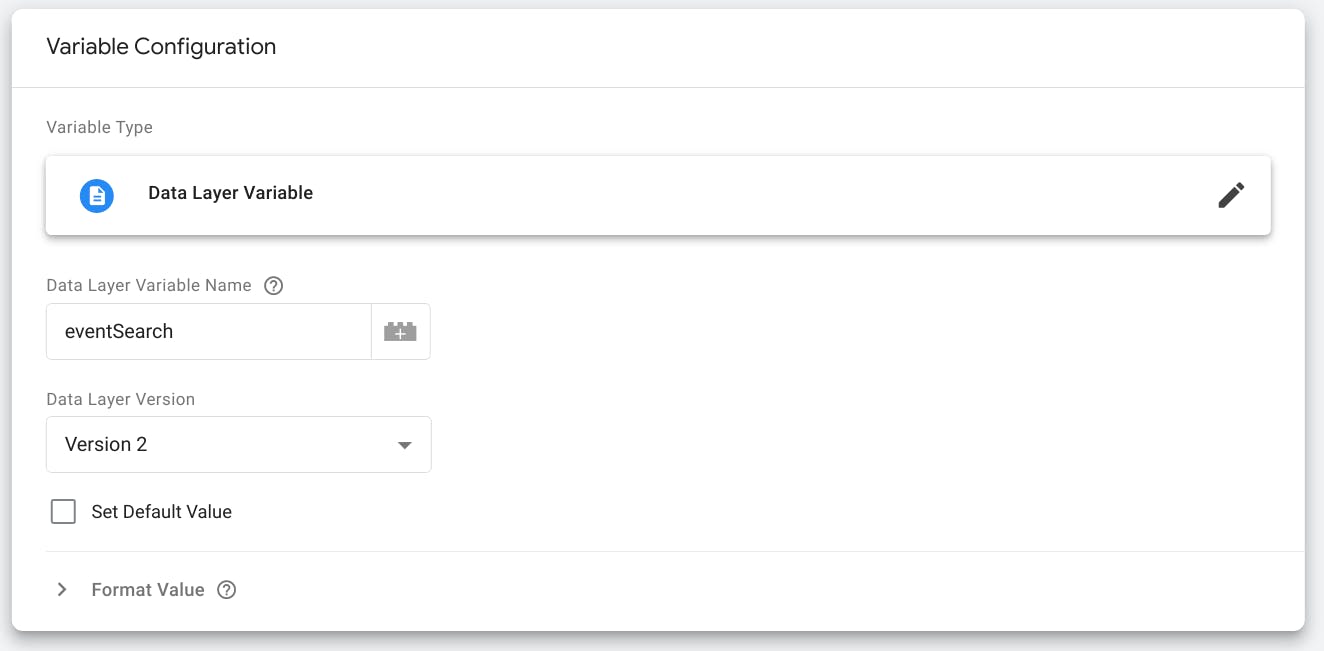
The variable name is "eventSearch"
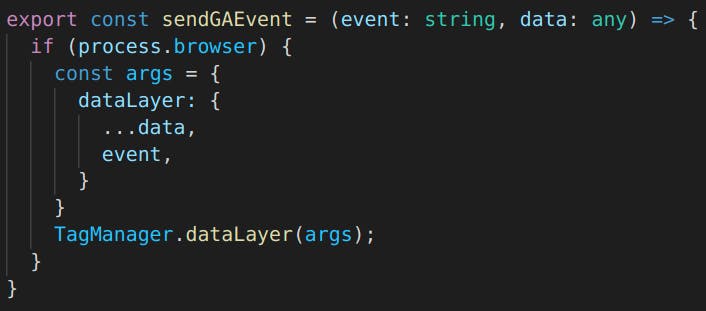
6. Send custom event in SPA
I use Next.js for my SPA, which is based on React.
There are different GTM libraries for React. I chose react-gtm.
After setting it up, I discovered another GTM library called react-gtm-hook, which is based on React hooks and offers a slightly better developer experience. I may try it out in the future to see if it is better.
Side note: I noticed that the "dataLayer" data that gets sent to GA contains data from all preceding events, which is a little annoying. I am not sure if this is supposed to happen or if I used it wrongly.
7. Test it in preview
Clicking on the "preview" button will bring up a new page that opens up the GA debugger that connects to your website.
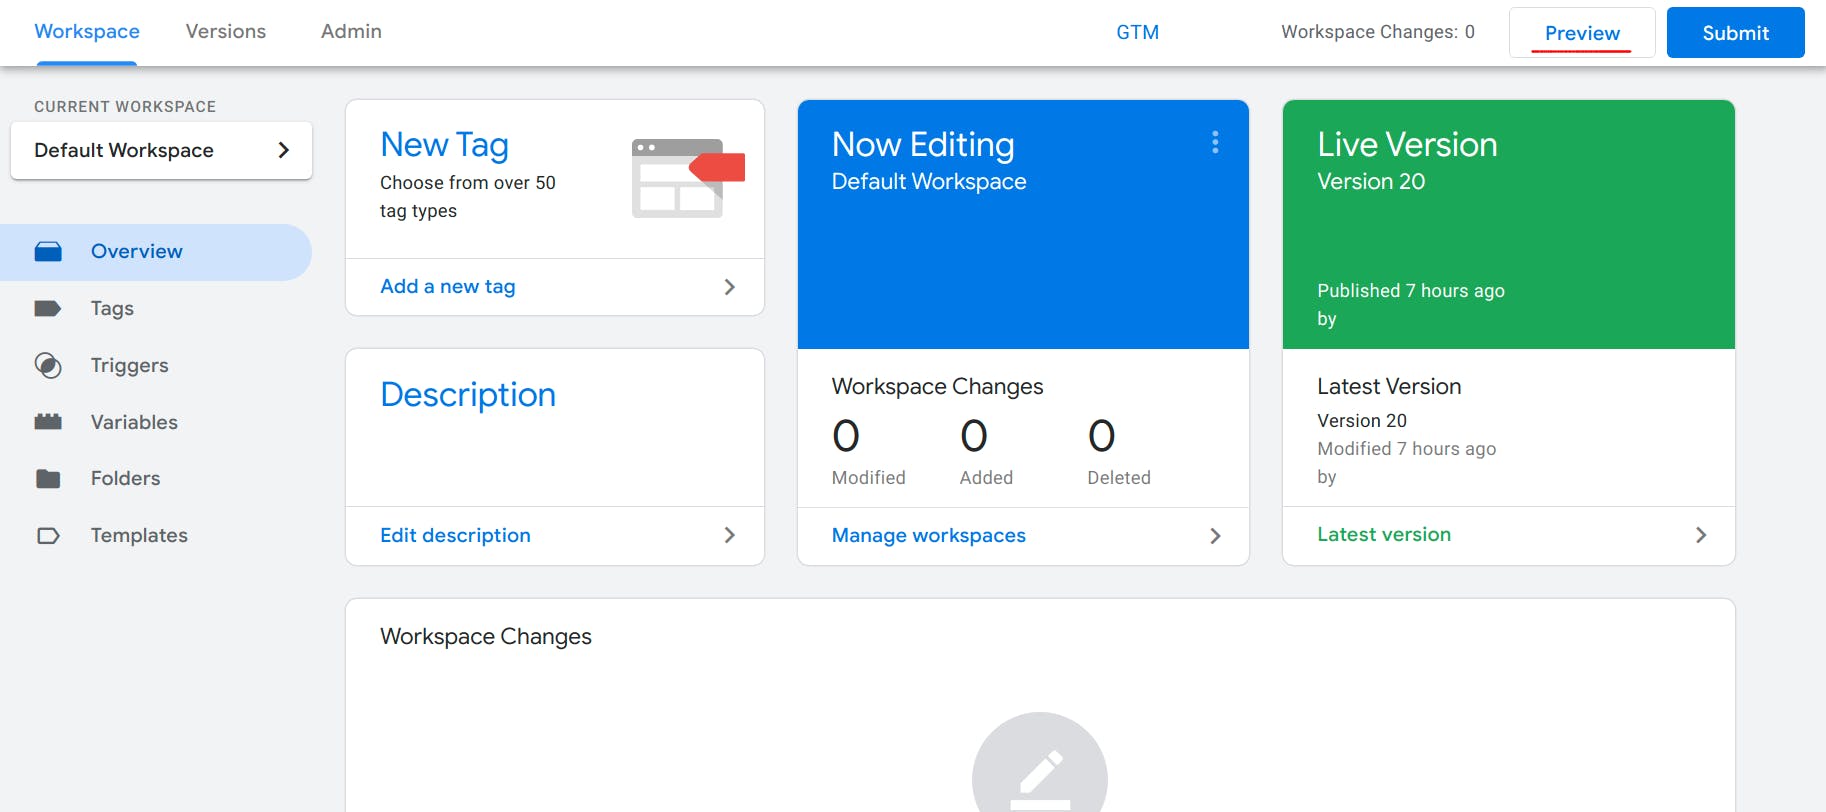
Click on preview at the top right corner
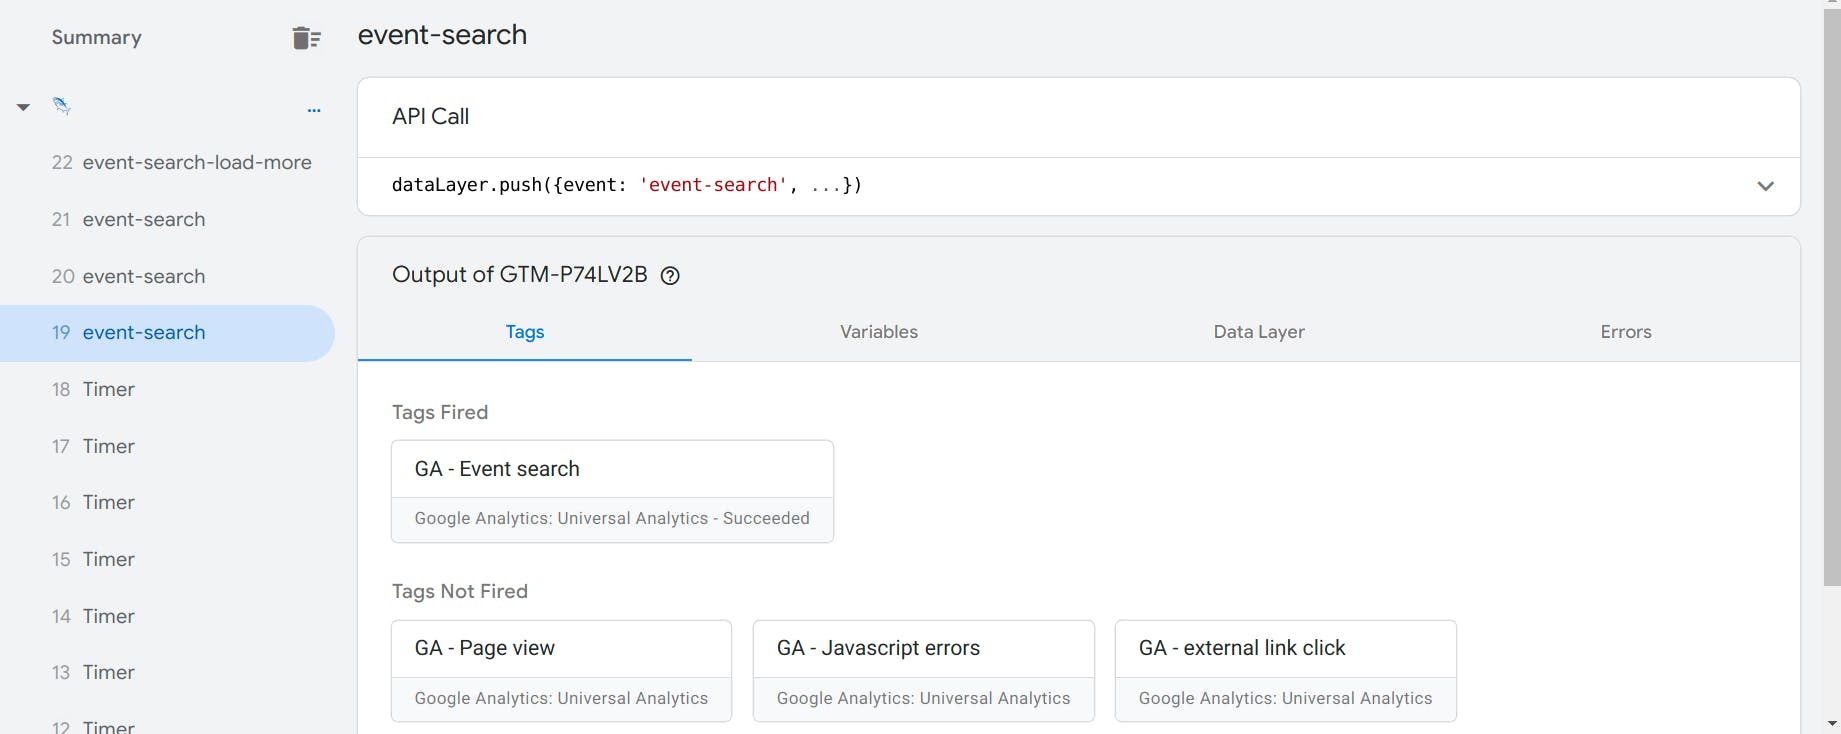
Trigger the event on your website, and make sure it appears in the preview window
8. Publish the changes
Remember to hit the Submit button. This can be one of the fixes to the problem of "it doesn't work" because we forgot to publish the changes.

Workspace changes shows the number of unpublished changes
9. Check GA real-time reports
Finally, to make sure the custom event is set up properly, go to GA real-time reports -> events. Trigger some events on the website, which should appear in the real-time dashboard after a second or two.

